
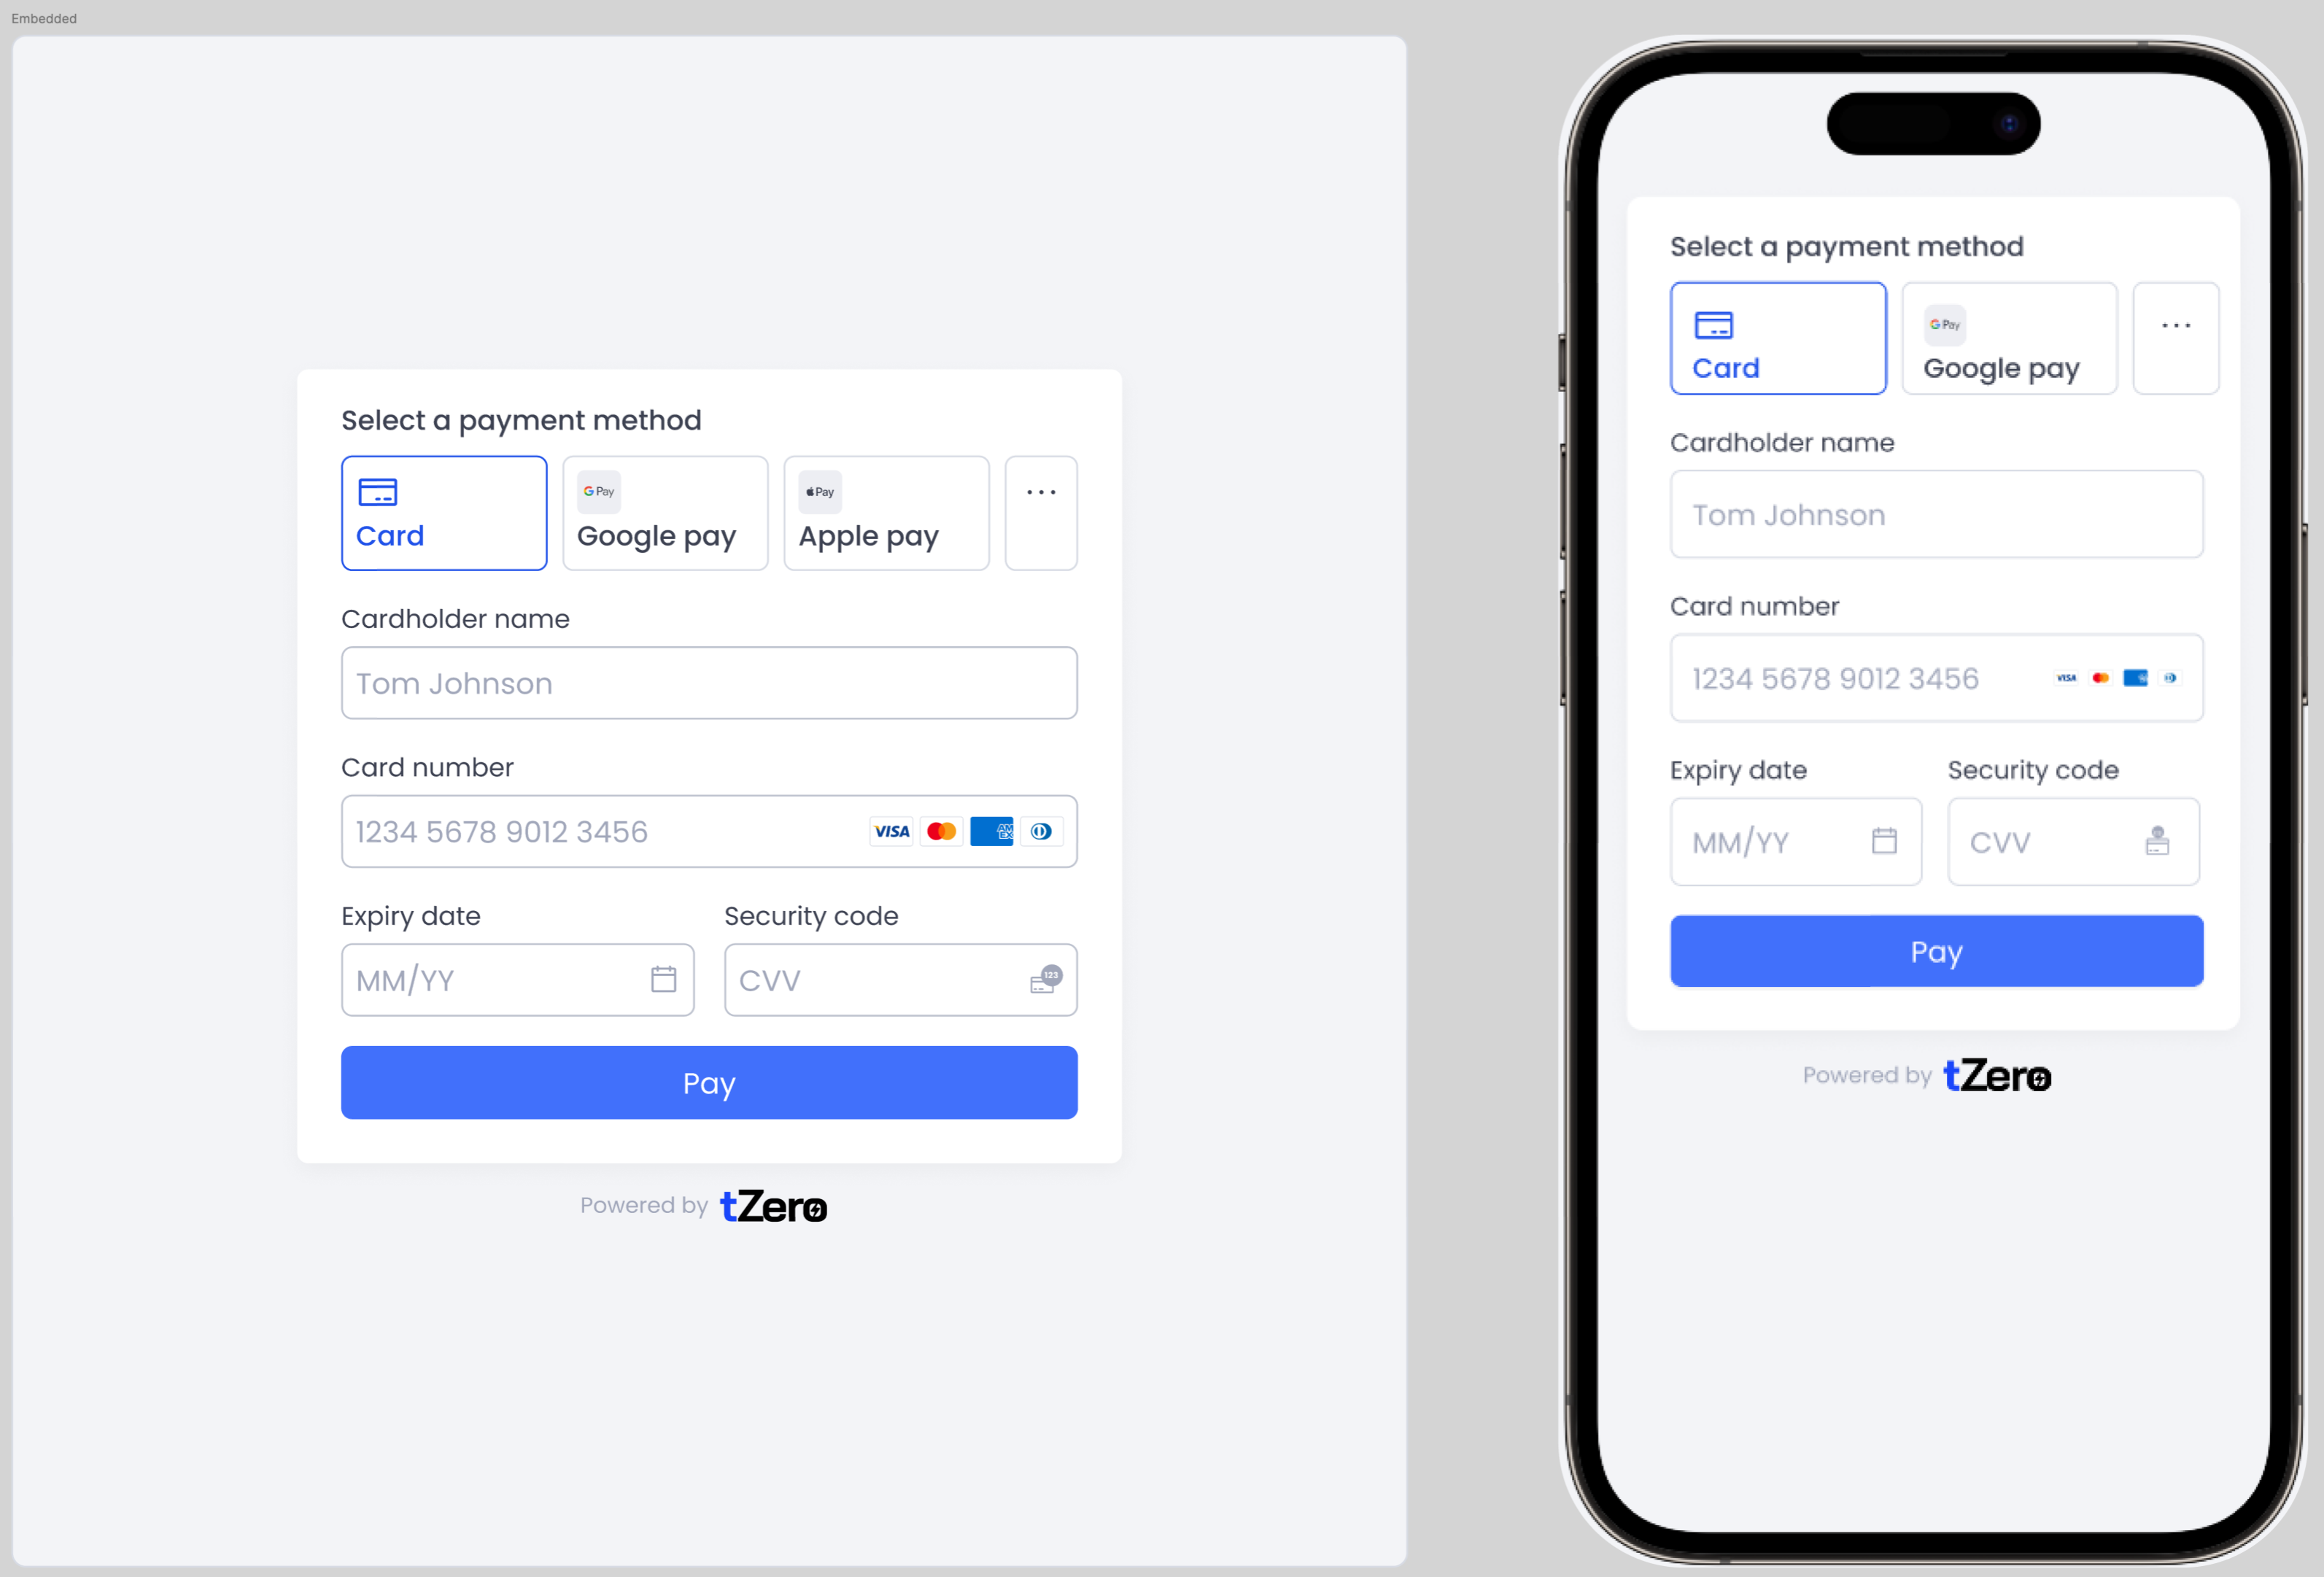
Embedded Solution
When the cardholder enters their card details in the Checkout.js form on their browser, the sensitive data is captured securely and sent directly to the Payment Gateway. The merchant’s servers never see or store the card number (PAN) or CVV. Instead, the gateway processes the card information and returns a token or payment reference to the merchant for further processing.
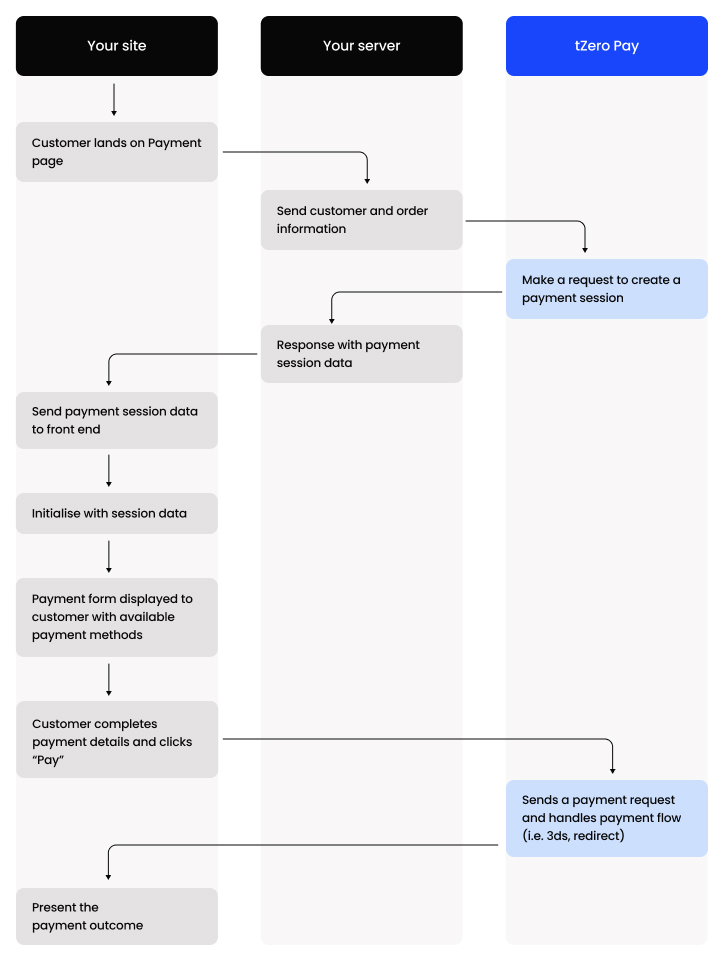
Payment Flow
- The customer lands on the checkout page.
- You perform a server-side request to create a payment session.
- You use the payment session data on the client-side to mount Flow.
- The available payment methods are displayed to the customer.
- When the customer clicks the Pay option, a payment request is performed with any additional actions. For example, additional actions required for 3D Secure (3DS) authentication, or a third-party payment page redirect.
- You receive a webhook notifying you of the payment status.
Checkout.js Integration Guide
This guide explains how to integrate the embedded checkout experience into your website using Checkout.js.
1. Include Checkout.js
Add the script to your website before the closing </body> tag:
<script src="https://cdn.yourdomain.com/checkout.js"></script>This will expose a global CheckoutLib function in the browser.
Initialize Checkout
2. Create a new instance of the checkout library with your public key:
public key:
<script>
  const checkout = CheckoutLib("pk_test_123456789"); // Replace with your real public key
</script>
3. Prepare Payment Configuration
Before rendering the checkout, you need the following values from your backend:
- paymentToken → Unique token identifying the payment session.
- secret → Used to securely authorize the payment.
- allowablePaymentMethods → Which payment methods are enabled (e.g.
["card", "apple_pay"]). - (optional) source, source_reference, client → If required for tenant or source attribution.
Your backend will typically generate these values via your Payment Gateway API.
Example config object:
const config = {
  paymentToken: "pay_token_123",
  secret: "secret_xyz",
  allowablePaymentMethods: ["card", "apple_pay"],
};
4. Create a Checkout Container
Add a container element in your HTML where the checkout will be rendered:
<div id="checkout-container"></div>5. Mount the Checkout
Use the initEmbeddedCheckout method to initialize checkout with your config, then mount it into your container:
<script>
  async function initCheckout() {
    const checkout = CheckoutLib("pk_test_123456789");

    const instance = await checkout.initEmbeddedCheckout({
      paymentToken: "pay_token_123",
      secret: "secret_xyz",
      allowablePaymentMethods: ["card", "apple_pay"],
    });

    instance.mount("#checkout-container");
  }

  initCheckout();
</script>Your users will now see the embedded Checkout UI inside the
#checkout-container, and can securely enter their payment details. All logic (authorization, capture, etc.) will be handled by the Payment Gateway.
- Never expose your secret key in frontend code. Only use the public key on the client side.
- Always create the paymentToken and clientSecret server-side via your backend.
- Ensure your site is served over HTTPS.
Updated 4 months ago